|
◆ Windows Server 2012 - Active Directory ドメインサービス - Install
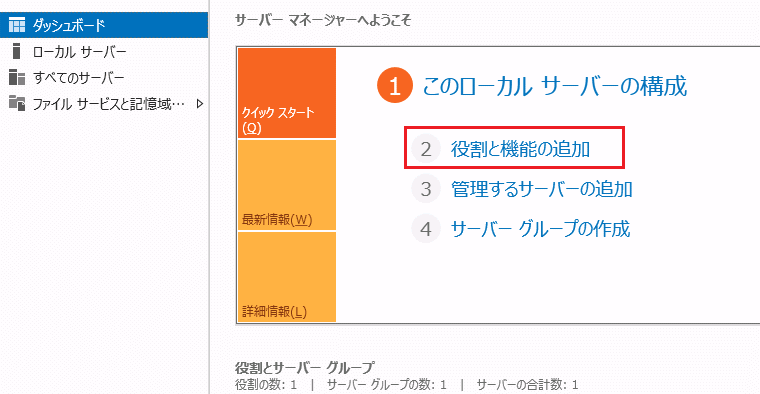
1. サーバーマネージャーのダッシュボードで「役割と機能の追加」を選択します。
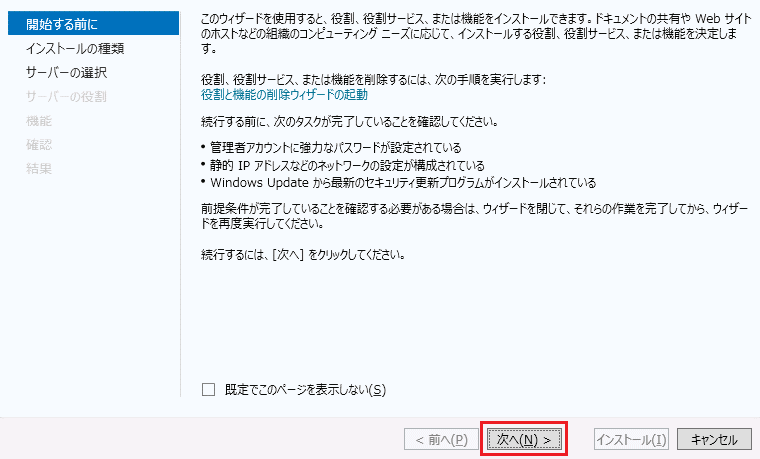
2. 「次へ」を選択します。
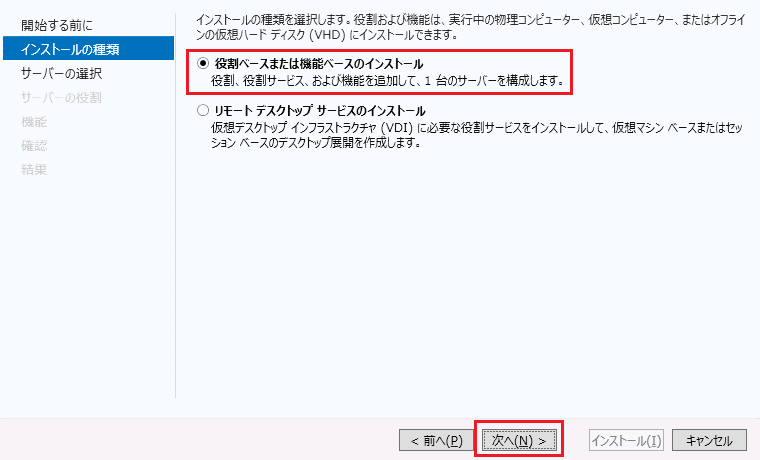
3. 物理コンピュータにインストールするため「役割ベースまたは機能ベースのインストール」を選択。
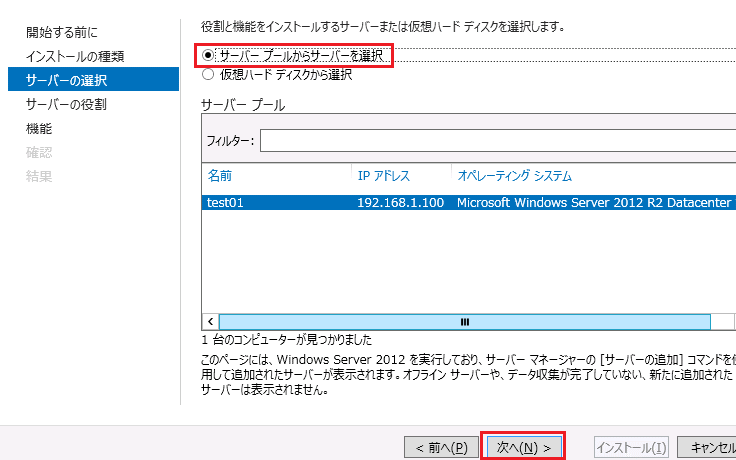
4. 以下の通り「サーバープールからサーバーを選択」をチェックして、「次へ」を選択します。
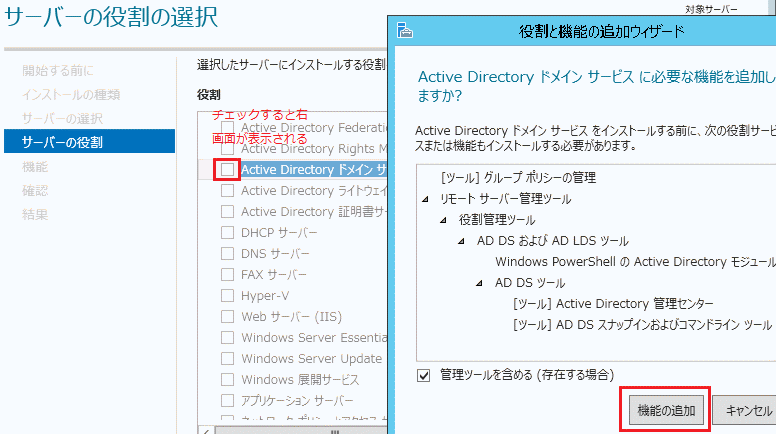
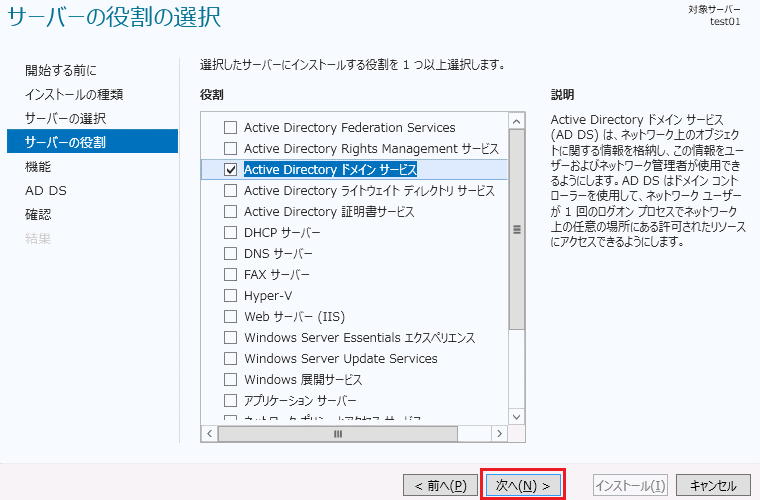
5. Active Directoryドメインサービスをチェックすると「役割と機能の追加ウィザード」が表示されるので
「機能の追加」を選択します。
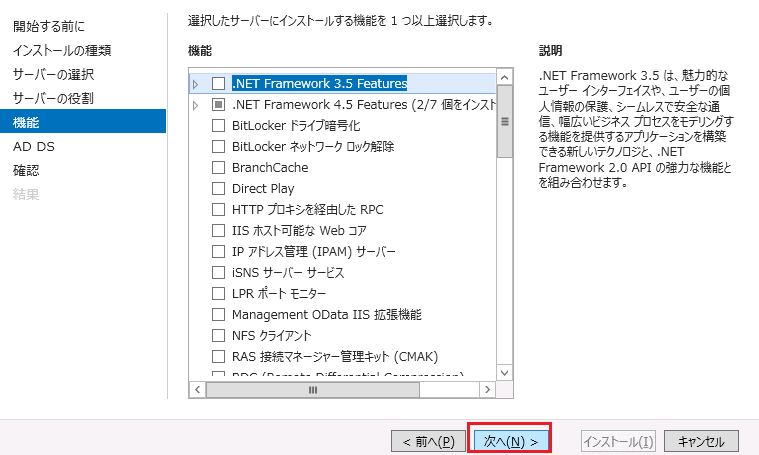
6. デフォルトの状態で「次へ」を選択します。
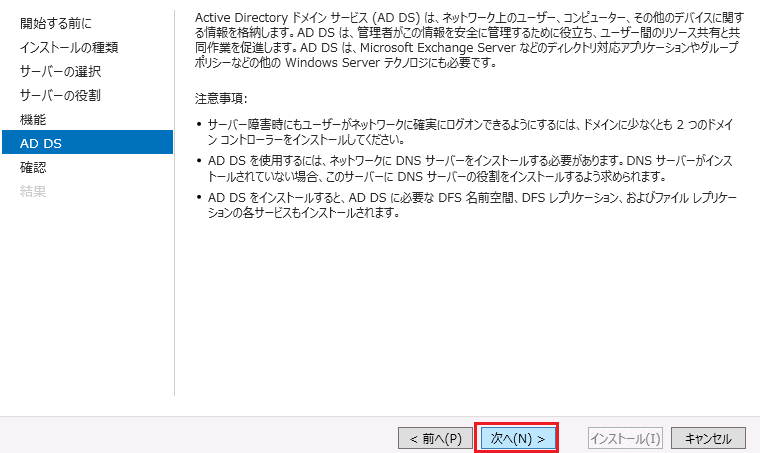
7. 「次へ」を選択します。
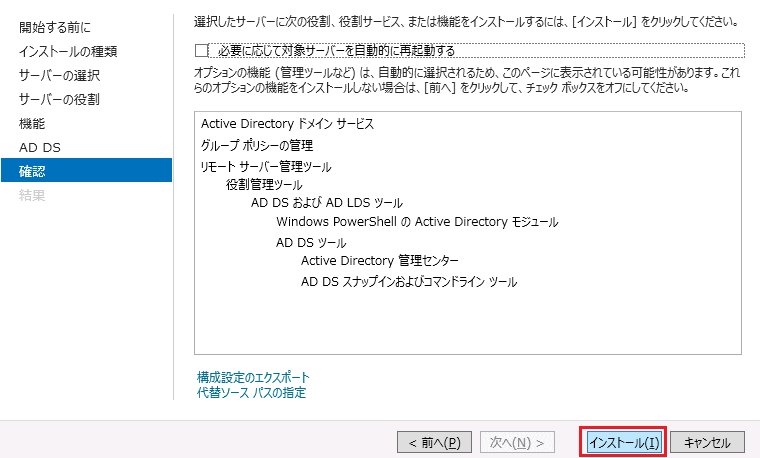
8. 「インストール」を選択します。これでインストールウィザードは終了します。
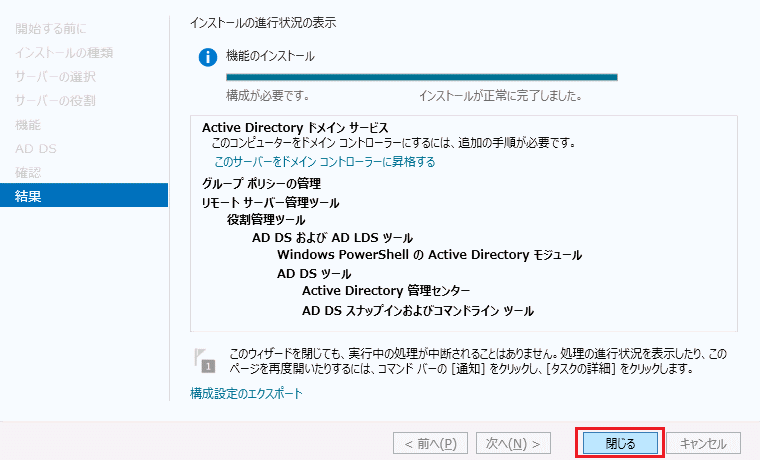
これでインストールは完了です。続いて、ADドメインサービスの「構成」をしていく必要があります。
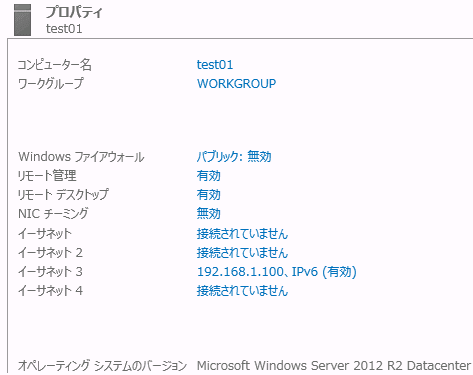
◆ 参考 : OSインストール直後の設定
上記のWindows Server 2012 ADドメインサービスのインストール前に実施したことは以下の通りです。
※ PC上で設定を行っていきたいため、リモートデスクトップを有効にしています。
◆ 「サーバマネージャー」 ⇒ 「ローカルサーバー」
|