|
◆ Cisco ISE - アプライアンス(SNS-3415-K9)
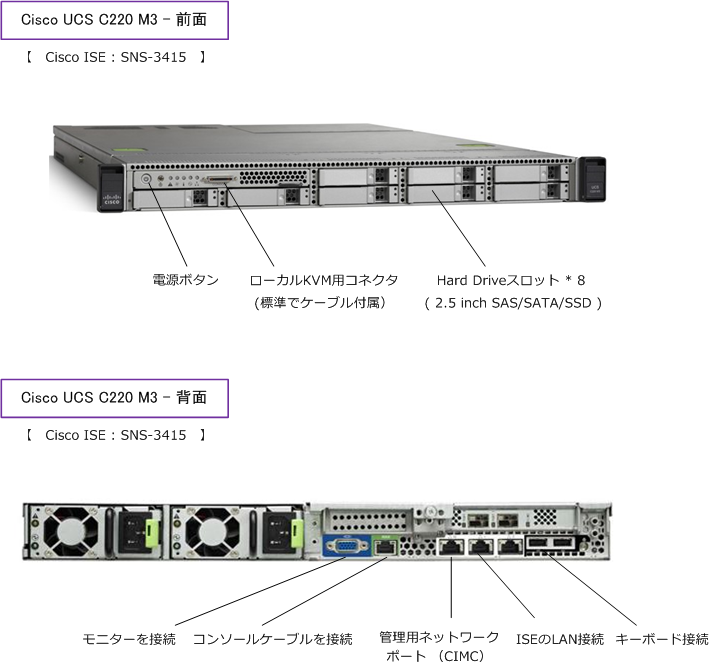
ISEのアプライアンスを購入した場合、標準で付属しているローカルKVM用コネクタがありますがこれは
必ずしも使う必要はありません。あと、コンソールの反応が良くないというか文字化けすることがあるので、
コンソール接続は、別ページで紹介するCIMCでのコンソール接続(表示)をお勧めします。
◆ Cisco ISE - セットアップ手順 その1
① Cisco ISEにモニターとキーボードを接続します。
② 以下の画面が表示されたら「F8」を押します。

以下の画面が表示されます。矢印キーでカーソルを移動して文字を入力したり、スペースキーを
入力することで設定項目の「Enable」や「Disable」を決定できます。
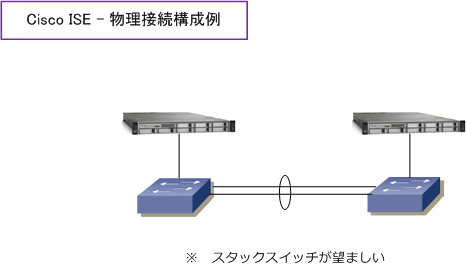
下図の構成を前提として、NIC modeはDedicated、NIC redundancyはNoneと設定します。
③ NIC modeは「Dedicated」でスペースキーを押してEnableにします。
| NIC mode |
説明 |
| Dedicated |
The 1-Gb Ethernet management port is used to access the CIMC.
You must select NIC redundancy None and select IP settings.
|
| Shared LOM |
The two 1-Gb Ethernet ports are used to access the CIMC. This is the
factory default setting, along with active-active NIC redundancy and DHCP enabled.
|
| Cisco Card |
The ports on an installed Cisco UCS P81E VIC are used to access the CIMC.
You must select a NIC redundancy and IP setting.
|
④ NIC redundancyは「None」でスペースキーを押してEnableにします。
| NIC mode |
説明 |
| None |
The Ethernet ports operate independently and do not fail over if there is a problem. |
| Active-standby |
If an active Ethernet port fails, traffic fails over to a standby port. |
| Active-active |
All Ethernet ports are utilized simultaneously. |
|